
Electric dirt bikes have become one of the most exciting ways for kids and teens to get outdoors. They're quieter than gas bikes, easier to maintain, and genuinely fun. But picking the right bike, preparing it correctly, and building safe riding habits all take real planning. This article walks parents through every step, from choosing the right model to getting a young rider confidently on the trail.
What to Look for When Choosing a Kids' Electric Dirt Bike
Not every electric dirt bike suits every young rider. Power, fit, tires, and brakes all vary significantly across models, and the wrong combination makes riding feel frustrating or unsafe from the start.
Power and Battery
For beginners, a modest speed range is sensible. For older teens with some experience, a more capable bike opens up real trail riding. Motor output determines how the bike responds to throttle input, and battery capacity determines how long a session can last. A higher-capacity battery matters practically when a family drives out to a trail park rather than riding in the backyard.

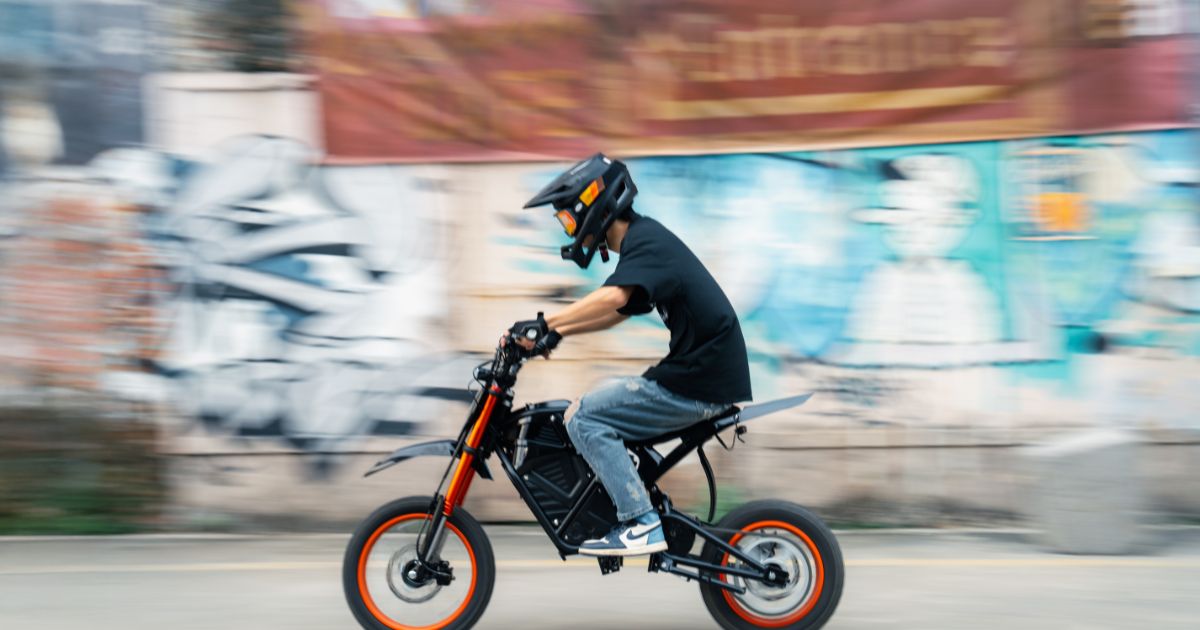
When it comes to capable youth electric bikes in this category, the Eskute Nova Mini stands out. It offers an adjustable speed and power output that can be limited for beginners and gradually unlocked as they gain experience, maxing out at a manageable trail speed. The seat height is 31.5 inches, with a recommended rider height range of 4'2" to 5'9", covering most school-age kids and teenagers. The 14x3.0" front and 12x3.0" rear all-terrain tires improve cornering stability and absorb trail vibration naturally. Hydraulic disc brakes respond faster than cable brakes and require less hand force, which gives younger riders more consistent stopping control. For families looking at a serious big wheel electric bike option for teens, it covers the key bases well.

Rider Fit
A youth electric bike that doesn't match the rider's body will feel unstable from the start. At a standstill, the rider should reach the ground with at least the balls of both feet. That ground contact prevents topples when stopping on a slope or recovering from a slow-speed wobble. Test this before buying.
Tires and Brakes
Wide tires and responsive brakes matter more than top speed for a new rider. Wider tires increase contact area during cornering and act as natural cushioning, absorbing trail vibration before it reaches the rider's hands. Hydraulic disc brakes provide more consistent stopping power than cable-actuated mechanical brakes, especially on mixed terrain. These two components together have a bigger effect on day-to-day control than motor power.
Matching the Bike to the Rider’s Growth
While every child develops at a different pace, these general categories help narrow down the search:
- Ages 6–10 (The Foundation): Look for lightweight, low-speed models (usually topping out around 12 mph). The focus here is simply building the muscle memory for balance and throttle control.
- Ages 10–13 (The Transition): Riders in this range benefit from mid-power bikes that feature adjustable speed governors. This allows them to move from the driveway to light trails as they prove they can handle more speed.
- Teens 13+ (The Trail Phase): For older or taller kids, a more robust "big wheel" machine is necessary. They need a bike with enough torque to handle actual inclines and a frame that won't feel cramped after a growth spurt.

How the Nova Mini Fits into a Growing Skillset
The Eskute Nova Mini is designed to grow with a rider rather than being a temporary fix. Thanks to adjustable power settings, it can be tuned down for beginners and "unlocked" as their confidence builds. With a 3500W mid-drive motor and 220N.m of torque, it has the muscle to climb hills that stall smaller bikes, while heavy-duty hydraulic brakes and 95mm travel forks ensure predictable handling. Supporting up to 400 lbs with a 60-mile range, it remains a capable platform well into a rider's teenage years.
How to Set Up the Bike Before the First Ride
A proper setup before any riding begins is not optional. Skipping it leads to poor handling, premature wear, and avoidable safety issues.
Seat and Handlebar Adjustment
Start with the seat. Lower it enough so the rider can place both feet flat or near-flat on the ground while seated. This is especially important for brand-new riders who haven't yet developed balance instincts on a moving bike.
Adjust the handlebars so arms are slightly bent when gripping at riding position. Straight, locked-out arms reduce reaction time and transfer more vibration, so a slight bend is the right baseline.
Tire Pressure and Battery Charge
Check both tires with a gauge before the first ride. Under-inflated tires reduce control noticeably in corners. Over-inflated tires reduce the cushioning effect the tire provides. The recommended range is printed on the sidewall. Charge the battery fully before the first session so the ride isn't cut short early.
Pre-Ride Checklist
Run through this before every session, not just the first:
| Check | What to Look For |
| Tire pressure | Within the sidewall's recommended range |
| Brake feel | Firm pull on both levers, bike stops cleanly |
| Battery charge | Full or sufficient for the planned session |
| Bolts and clamps | Handlebars, seat, and axle bolts are tight |
| Chain | Clean, lubricated, correct tension |
These five checks take under five minutes and catch most problems before they become trail-side issues.
Safety Gear Every Young Rider Needs
Gear selection is straightforward once the priorities are clear. Protection matters more than appearance, and fit matters more than price.
Helmet
A full-face helmet is the baseline for any off-road riding. Open-face or bicycle-style helmets don't protect the chin or jaw in a forward fall. The helmet should sit level, cover the forehead, and not rock forward or back when the chin strap is fastened. Replace any helmet after a significant impact, even if it looks undamaged on the outside.
Body Protection
Knees and elbows take the most impact in beginner falls. Knee and elbow pads with hard outer shells provide meaningful protection. Gloves protect the palms in low-speed spills and improve grip in dusty or wet conditions.
For teens riding at higher speeds, a chest and back protector is worth adding. Padded riding pants cover the hips and thighs, areas that absorb a lot of impact in side falls.
Boots
Standard sneakers offer no ankle or shin protection. Dedicated motocross boots or sturdy off-road boots cover the ankle joint and reduce injury risk significantly in foot-down situations. Fit them properly so they don't shift during a ride.
How to Build Riding Skills Step by Step
Progression matters. Jumping ahead before foundational skills are solid leads to falls that could have been avoided.
Stage 1: Flat Ground Control
Every new rider should begin on flat, open ground, ideally packed dirt or short grass. The goal is simple: smooth throttle application and clean, controlled stops. Nothing else.
Most beginners over-apply the throttle immediately. Practice starting slowly, riding 10 to 15 meters, and stopping cleanly. Repeat this until it feels natural. Young riders benefit greatly from this early throttle discipline, since electric motors respond instantly and too much input too fast can cause lurching.
Stage 2: Turns and Surface Changes
Once flat-ground starts and stops are comfortable, add gradual turns. Wide, sweeping arcs come first. The rider should look through the turn rather than at the front wheel, and lean the body slightly into the corner rather than staying rigidly upright.
Surface transitions come next. Practice moving from packed dirt onto grass and then onto light gravel. Each surface requires slight adjustments in grip and braking distance. Learning this early builds the instinct riders rely on when trails become less predictable.
Stage 3: Slopes and Trail Riding
Gentle inclines introduce weight distribution. Going uphill, the rider shifts weight slightly forward to maintain front-wheel traction. Going downhill, weight moves back, and braking should be smooth and gradual rather than sharp. Locking wheels on a downhill slope is a common beginner mistake. Brakes that respond consistently and don't require heavy hand force help prevent this.
Stage 4: Advanced Skills
With solid control at moderate speeds, advanced moves become accessible to experienced teen riders. Wheelies, off-camber turns, and controlled swerves are realistic goals at this stage. Adult supervision remains a sensible practice even for capable riders attempting new moves.

Start the First Ride Right
A good first ride builds confidence. A bad one sets it back weeks. Match the bike to the rider's size, run through the setup checklist, put on full gear every time, and follow the progression stages without rushing. Take each stage at the rider's own pace and resist the urge to skip ahead.
Frequently Asked Questions
Q1: What Age Is Appropriate for a Kids' Electric Dirt Bike?
Most kids' electric dirt bikes suit riders aged 8 and up, though the right age depends on the child's size and coordination. Younger children may lack the hand strength and reaction time to control a more powerful model safely. A better approach is to match the bike to the child's physical size and demonstrated ability rather than setting a fixed age cutoff.
Q2: How Fast Can Electric Bikes for Teens Safely Go?
New riders should stay under 15mph until flat-ground control feels natural. Speed should increase gradually alongside skill. It’s highly recommended that riders fully master smooth braking and handling before attempting higher speeds, regardless of their age. Build the skills first, then open up the throttle range.
Q3: What Safety Gear Is Actually Necessary for Off-Road Riding?
Full-face helmet, gloves, knee pads, and elbow pads are the minimum for every ride. Off-road boots, chest protection, and padded pants add meaningful coverage for riders going faster or practicing advanced moves. Gear fit matters as much as gear choice. Loose protection shifts out of position when it's needed most.
Q4: Is the Nova Mini Too Powerful for a Total Beginner?
Not necessarily. While the Nova Mini is a capable machine, it features adjustable speed and power settings. This allows parents to limit the output to a lower, manageable pace while a child is learning the basics. As their skills and confidence grow, you can gradually unlock more power. This makes the bike a smart long-term investment, as it grows with the rider rather than being a toy they will quickly outpace.
Q5: How Long Does Setup Take Before the First Ride?
A proper first-time setup takes around 20 to 30 minutes. This includes adjusting seat height, setting handlebar position, checking tire pressure, tightening all bolts, and charging the battery fully. After that, the five-point pre-ride checklist before each session takes under five minutes and should become a consistent habit from day one.


Share:
Best Electric Trikes for Seniors: A Stability-First Buying Guide (2026)
Teen E-Bike Sizing Guide: Matching Wheel Size to Height